
Backing Up a Synology NAS to WD My Cloud NAS using HyperBackup
Introduction
In a recent blog post, I explained my approach for securing my data on a NAS. In this blog post, I’d like to explain how I back up my home NAS to a remote NAS by showing the (somehow gimmicky) process of setting up an automatic backup process from a Synology NAS to a «WD My Cloud Mirror Gen 2» NAS (short «WD My Cloud» hereafter). If you have recently upgraded from a WD NAS to a Synology NAS, this may help using your old NAS as a remote backup destination, rather than throwing it into your basement. The main motivation of doing this is the implementation of a 3-2-1 backup strategy, explained in this blog post.

This article is based to a large extent on a blog post by pentestit.de and I would like to give them credits for laying the foundation of this post. In this post, I will not only summarize their approach but also show some refinements I made as well as highlight some of the caveats I encountered following their approach. Finally, I will try to break down certain concepts into simpler language for non-experts and explain how I specifically implemented my off-site, remote NAS backup.
This tutorial presumes that the reader has basic knowledge of linux, IPv4 addresses and port forwarding. Basic knowledge of rsync is of advantage.
What is rsync?
rsync is a command-line utility used for efficient file synchronization and data transfer between different locations. It minimizes data transfer by only copying the portions of files that have changed. It supports features like compression, encryption, and the preservation of file attributes, making it a versatile tool for backup, mirroring, and remote file synchronization (thanks to ChatGPT for this succinct description of rsync)!
Approach Overview
The approach proposed in this article is using Synology’s pre-installed remote backup utility “HyperBackup”, which cannot only create one-off backups but is capable of backing up file history and versions in a smart way, thus working similar to the pre-installed utility “Time Machine” in MacOS. HyperBackup cannot only backup to other Synology NAS but also to any Linux server with rsync, as long as the server has a public and stable IP address. The latter approach is explained below. In the text below, I will call my Synology NAS, which sits at my home office, my «Origin NAS» and I will call the WD My Cloud NAS, which sits in a relative’s apartment, my «Remote NAS».
Requirements: IPv4 Addresses
Having a static IPv4 address on both the home NAS and remote NAS are an important condition for being able to follow the instructions below. Nowadays, many internet carriers don’t offer static IPv4 addresses anymore but only dynamic IPv4 addresses, which change regularly, using so-called Carrier-Grade NAT (CGNAT).
Why are carriers not offering static IPv4 addresses anymore?
The primary reason is the depletion of available IPv4 addresses. IPv4 addresses are limited in number, and the demand for them has far exceeded the available supply. With the growth of the internet and the increasing number of connected devices, the pool of unallocated IPv4 addresses has significantly diminished. As a result, carriers may be conserving their remaining IPv4 addresses for more critical purposes, such as supporting their infrastructure or allocating them to larger business customers (thanks to ChatGPT for this precise summary!).
While this is not an issue for most “normal” internet users, it may cause issues to people who want to set up a home server or a smart home. I am based in Switzerland and subscribed to an internet package by Salt, who charge an additional 10 Swiss Francs per month for having a fixed IPv4 address (on-demand, need to call hotline). At the location of my remote NAS, the internet provider is Sunrise, who does currently not use CGNAT and seems to provide semi-static IPv4 for free. That is, over the months of using the remote NAS, I’ve noticed that the IPv4 address may change when the router is restarted, but it remains static thereafter.
Preparation on Remote NAS
The first step in setting up the remote NAS as a backup source is to access WD’s web interface. From there, one needs to perform the following steps:
- Define a new disk partition for storing your backups, called [PARTITION] hereafter
- Obtain access to the NAS’ terminal through SSH. Notice that this voids the WD My Cloud warranty (which was no issue for me as I bought it a few years ago). You’ll need to define a SSH password, which will be called [SSH_PASS] going forward. I will call the SSH user profile which you access your NAS [SSH_USER] hereafter.
Outside of the NAS interface, you need to do the following things:
- At the remote NAS’ destination:
- Get your IPv4 address at the remote NAS network, which can be obtained using websites such as https://whatismyipaddress.com. I will call the remote NAS IP address [REMOTE NAS IP ADDRESS] hereafter
- Set up port forwarding rules for accessing your remote NAS through SSH. I would suggest not using the standard SSH port but a random, high number instead, such as 40101. I will call the remote port through which you SSH into your remote NAS [REMOTE NAS SSH PORT] hereafter.
- At the origin NAS’ destination:
- Get your IPv4 address of the origin NAS network following the same approach as for the remote NAS
					ssh [SSH_USER]@[REMOTE NAS IP ADDRESS] -p [REMOTE NAS SSH PORT]
`#from the Synology NAS, connect to the WD NAS via SSH.`
`#starting on the lines below, we are connected to the remote NAS via SSH.`
`#on the remote NAS, first, use the command "echo…" to write the following lines to a file rsyncd.conf (end on line 20)`
echo "use chroot = no
uid = root
gid = root
secrets file = /etc/rsyncd.secrets
pid file = /var/run/rsync.pid
timeout = 300
Hosts allow [ORIGIN NAS IP ADDRESS] `#Specifically allow origin NAS IP to connect to the remote NAS`
`#define target rsync process for backup process`
[ [PROCESS_NAME] ]
path = /mnt/HD/HD_a2/[PARTITION] `#location where backup will be saved on remote NAS`
read only = false
list = yes
auth users = [SSH_USER]">/etc/rsyncd.conf `#add SSH user name to authenticated users`
`#write user password(s) in secrets file`
echo "[SSH_USER]:[SSH_PASS]">/etc/rsyncd.secrets
`#restrict access to secrets file`
sudo chmod 600 /etc/rsyncd.secrets
The [PROCESS NAME] variable can be set as wanted, e.g., “SynBackupWD”. This will later show up in the list of available rsync processes.
The code lines above fully set up the rsync client on the destination NAS, in this case, WD My Cloud. What’s practical about this approach is that by using an SSH connection, you can always re-do these steps if the rsync client ever stops working on the destination NAS. This typically happens if the WD My Cloud NAS installs automatic firmware updates, in which case it restarts. Whenever the WD My Cloud NAS restarts, the files written above are erased. I tried adding a CRON job, in order to avoid manually restarting the rsync process every time, however, there seems to be no easy way to do this on WD NAS devices currently.
Connecting Synology NAS to Remote NAS
Now, on your Synology NAS, connect to the rsync server:
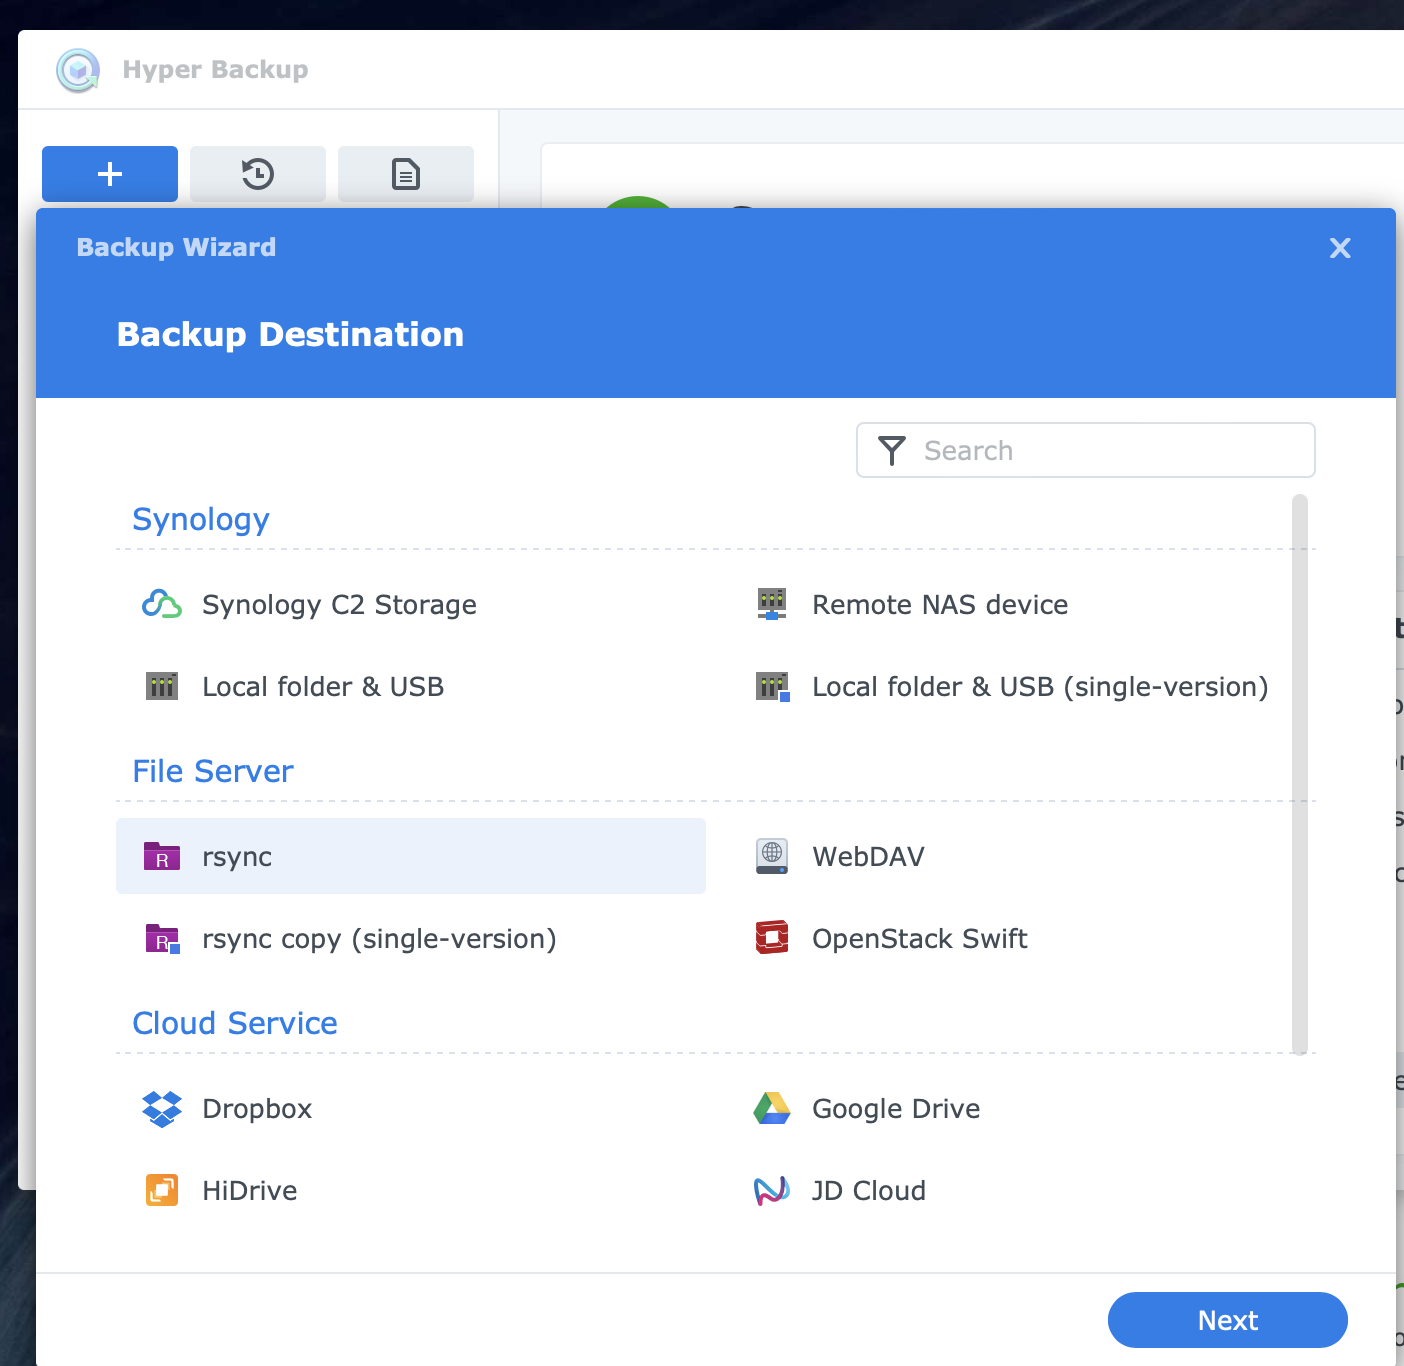
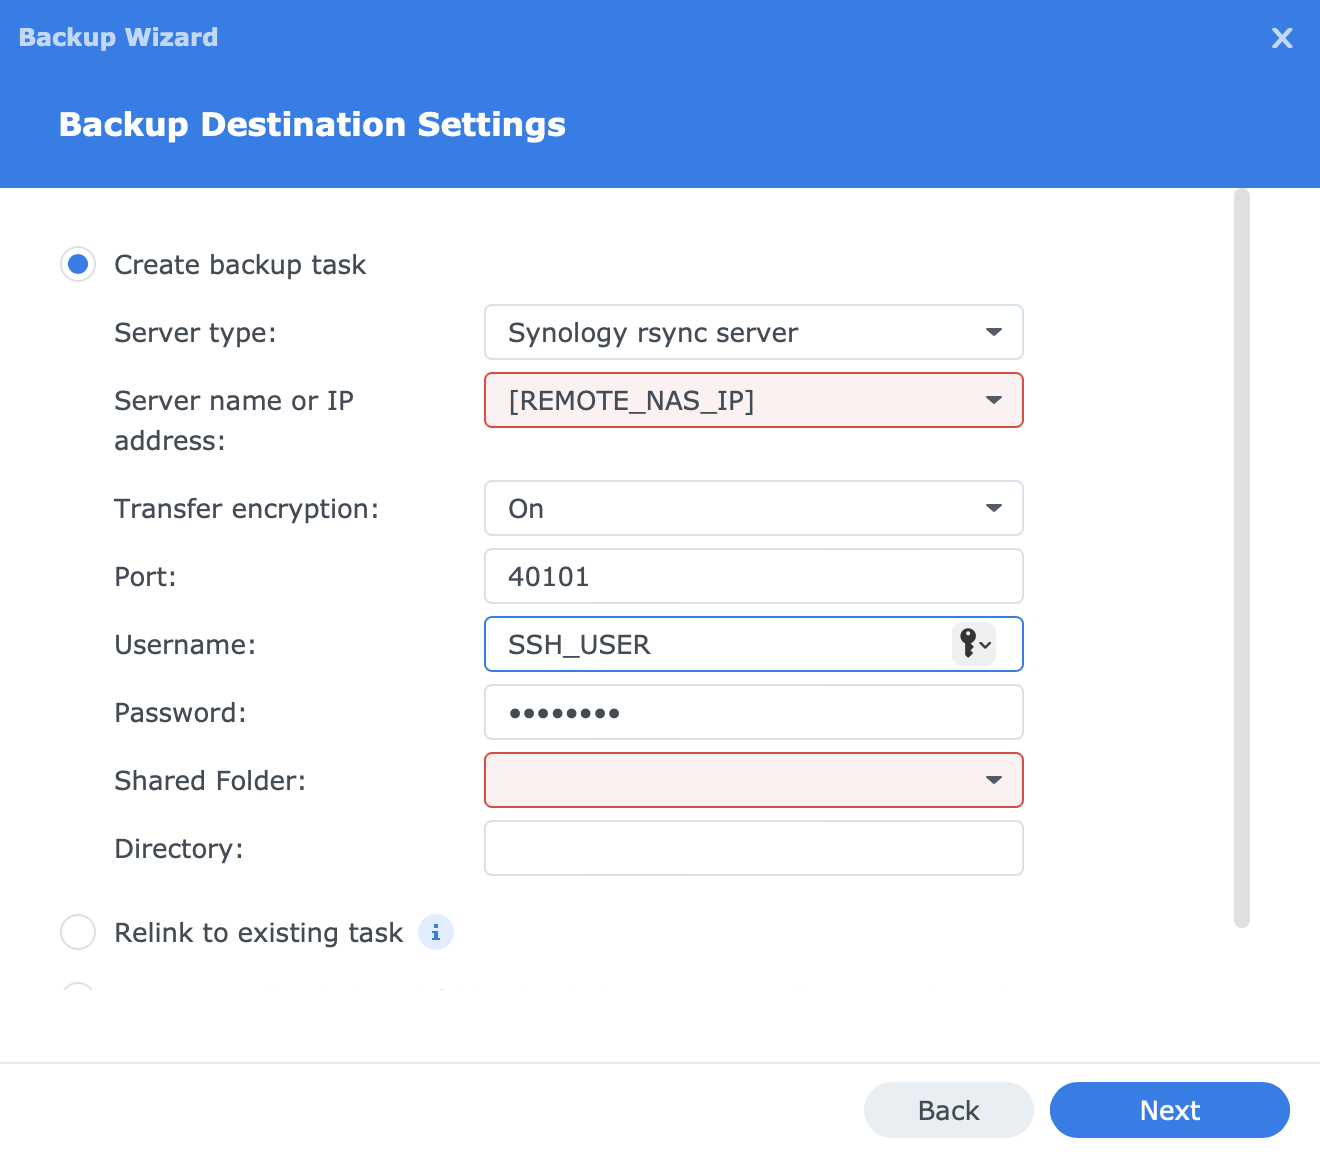
And that should be it! Please let me know if you found these instructions helpful and or if you have any refinements for this blog post.
Disclaimer
The purpose of this blog post is to share my personal experience with certain IT projects rather than to give a comprehensive or systematic overview of certain tools. Although I provide some tutorials, I would like my contents to be used in a more inspirational way. I don’t take any responsibility for lost, stolen or corrupted data, or any other form of detrimental outcome resulting from the usage of the contents of this blog. Usage of these contents for malign or criminal intents are most strongly discouraged and no responsibility is assumed by the creator of this blog article for any such actions.